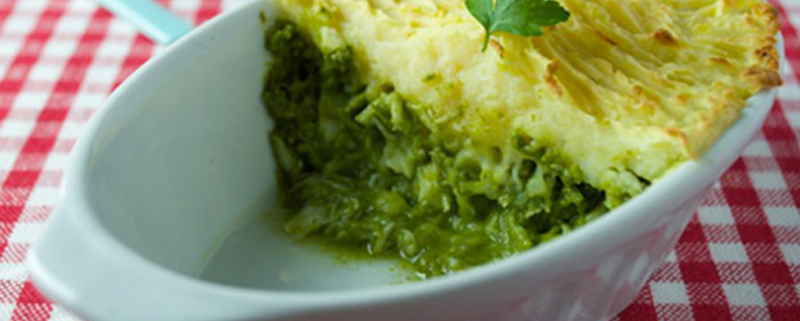
Fish Pie with Watercress Sauce
This family-friendly fish pie with watercress sauce recipe will be loved by adults and children alike. Packed with veggies and flaky white haddock, a great source of vitamins and proteins, this is a hearty and healthy dish that will quickly become a favourite. This dish is also suitable for freezing, so it’s a great one to make in advance.

Fish Pie with Watercress Sauce
Ingredients
- 800 g potatoes
- 1 handful fresh mint leaves
- 1 handful fresh parsley
- 2 handfuls of rinsed watercress very large stalks removed
- 1 clove of garlic
- Juice of half a lemon
- Crunch of black pepper
- 150 ml double cream
- 2 MSC certified sustainable haddock fillets skinned and boned or other sustainable white fish
- 150 g frozen peas
- Large knob of unsalted butter
- Two whisked eggs optional
Instructions
- Preheat your oven to 200°C/400°F/Gas Mark 6.
- Peel the potatoes, chop into quarters and drop into a large pan of cold water. Bring the potatoes to a boil on the hob then reduce to a medium simmer. If you have a steamer pan, use the bottom part to boil your potatoes and then you can use the same water to steam your fish over the top. Pop a timer on for 15 minutes.
- Meanwhile, put the mint, parsley, watercress, lemon juice, peeled garlic clove, black pepper and cream into a high speed blender, and blend until smooth.
- When the timer goes off on the potatoes, add the fish fillets to the steamer, along with the peas. Put the lid on and steam for 5-10 minutes, or until the fish is soft and flaky and the peas and potatoes just tender (timing depends on the size of the fish fillets). This does cook surprisingly quickly though so don't leave it! Alternatively, you can poach the fish and peas in water in a separate saucepan. The saucepan needs to be wide enough to allow space for the fish to sit completely under the water. Simmer on medium heat for 5-10 minutes until the fish is flaky and the peas tender. (The total cooking time for the potatoes is 20-25 minutes).
- Turn your steamer off and put the fish onto a plate and break into flakes (ensuring there are no bones). Drain the potatoes and mash in a bowl with the butter and whisked eggs. The eggs give the potato a wonderful golden crust when baked, but can be left out if you prefer.
- Now to create your pie. Put the flaked fish and green peas into a ceramic dish 25cm x 15cm, by 5cm deep (or 3 individual portion sized dishes). Pour over the green sauce and stir through. Spoon the mashed potato on top, carefully pressing the potato to the edge of the dish to seal in the contents. Fork over the mash to create a beautiful finish.
- Pop the pie into your preheated oven for 20 – 30 minutes, or until the potato is nice and golden
- Mash or blend to desired consistency, or serve as it is for older babies/toddlers.
Notes
If you don't have a steamer, you can simply poach the fish in a saucepan of water for the same time along with the peas.